How to Quick Create a Character in MegaNova Studio
Quick Create is the fastest way to turn an idea into a playable AI character in MegaNova Studio.
Instead of manually filling out every field, Quick Create lets AI handle the heavy lifting for you. With just an image (uploaded or generated), MegaNova Studio will automatically create all the required character fields — ready to chat, refine, or export.
This guide walks you through the entire Quick Create process from start to finish.
What Is Quick Create?
Quick Create is designed for creators who want speed and momentum. You provide a visual reference, and MegaNova Studio generates:
- A character persona
- Core descriptive fields
- A ready-to-use character setup
You can treat the result as a final character or as a strong starting point to refine later.
Step 1: Start a New Character
From MegaNova Studio, click Create, then choose Quick Create.
This opens the Quick Create flow, where everything starts with a character image.
Step 2: Choose How to Provide an Image
You have two options:
Option A: Upload Your Own Image
If you already have character art:
- Upload the image directly
- The image becomes the visual foundation of your character
This option is ideal if you already know what the character looks like.
Option B: Use AI Image Generation
If you don’t have an image yet, MegaNova Studio can generate one for you.
When using AI Image Generation:
- Select an AI image model
- Choose a painting style, such as:
- Anime
- Realistic
- 3D
- Chibi
- Cartoon
Next, choose the character’s gender, and optionally add painting tags to guide the image — such as pose, clothing, or general vibe.
You can also add a short description of the character’s appearance. This step is optional, but helpful if you have something specific in mind.
Step 3: Generate Images
Each image generation session:
- Uses 30 credits
- Produces 4 images per session
Review the four results, select the image you like most, then click Apply to use it for your character.
This selected image will be used as the visual anchor for the entire character creation process.
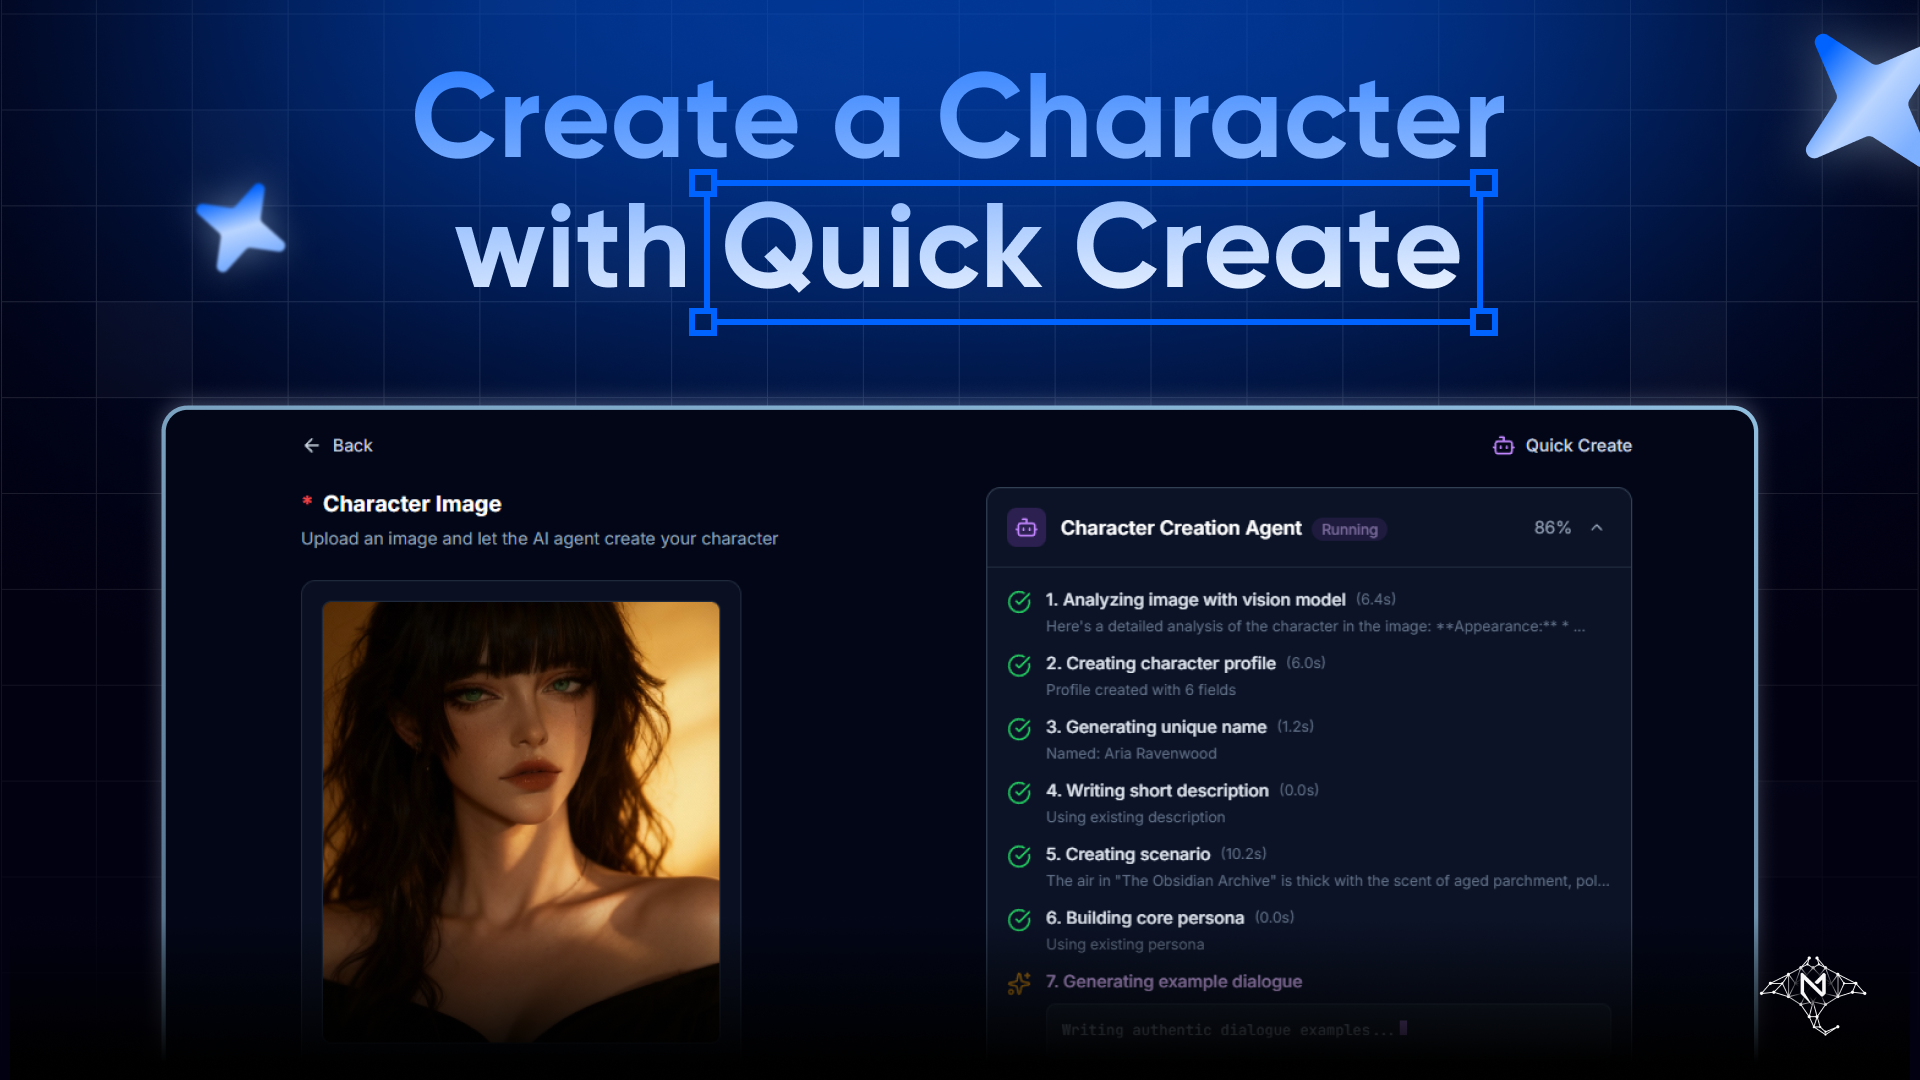
Step 4: Generate the Character
Once your image is selected, click Generate.
MegaNova Studio will automatically create all required character fields based on the image, including personality direction and core setup. This is the “magic moment” where your image becomes a living character.
No manual configuration is required at this stage.
Step 5: Review and Edit (Optional)
After generation, you can review every field the AI created.
You’re free to:
- Adjust personality details
- Edit descriptions
- Fine-tune any part of the character
Quick Create doesn’t lock anything. It simply gives you a complete starting point. When you’re satisfied, click Save to finalize the character.
Step 6: Export Your Character
Once saved, you can click Export to download your character as a character card.
This allows you to:
- Use the character elsewhere
- Share it with others
- Keep a portable version of your work
When Should You Use Quick Create?
Quick Create is ideal when:
- You want results fast
- You’re inspired by visuals
- You prefer refining over building from scratch
- You’re experimenting with new ideas
It’s often the best first step — even for advanced creators — because you can always move into deeper editing later.
What to Do Next
After Quick Create, you can:
- Refine the character in Expert Mode
- Test behavior through chats
- Collaborate with others in Spaces
- Create variations or alternate versions
Quick Create is not the end of the process — it’s the fastest way to begin.
Final Thought
Quick Create removes friction from character creation.
With just an image and a few choices, you can go from idea to fully generated character in minutes — then decide how deep you want to go from there.
If you want speed without sacrificing control, this is where to start.
Stay Connected
- Website: meganova.ai
- Discord: Join our Discord
- Reddit: r/MegaNovaAI
- X: @meganovaai